
Here I am. First recipe post after talking about healthy stuff and I am posting about bread. I just had to, Jalna has been posting about making bread so how could I forget my bread making adventures a few months ago? Remember when yeast was harder to find than clorox wipes? Well, somehow I found out Elvin’s Bakery was selling both bread flour and instant yeast, it was fate. I watched many videos of people making Hokkaido milk bread and I just had to try it myself. My first try? Complete failure, I had to throw it out. Then I got the hang of it…biggest difference? Measuring ingredients in grams and using a kitchen scale. I’ll post the recipe and then some step by step photographs…hang with me to the end…for the most satisfying bread pull (well satisfying for me).
Hokkaido Milk Bread
Makes one bread in a 5×9 inch loaf pan
Tang Zhong:
35 g (1/4 cup) Bread Flour
175 g (3/4 cup) Water
Prepare the Tang Zhong:
1. In a non-stick pan combine bread flour and water.
2. Cook, stirring constantly, over medium heat until the mixture thickens into a pudding-like consistency, or reach 65°C-150°F.
3. Transfer into a small bowl, cover with plastic wrap and cool down at room temperature.
4. You can use it when cool down or, better, refrigerate it overnight: use it at room temperature!
Milk Bread:
Bread Flour 340 g (2+2/3 cup)
Salt 3 g (1/2 teaspoon)
Sugar 30 g (2 tablespoons)
Active Dry Yeast 5 g (1+1/4 teaspoon)
1 Medium Egg (about 40 g), room temperature
Whole Milk, lukewarm, 140 g (1/2 cup+1 tablespoon) – microwaved for 1 minute
Tang Zhong (about 155 g)
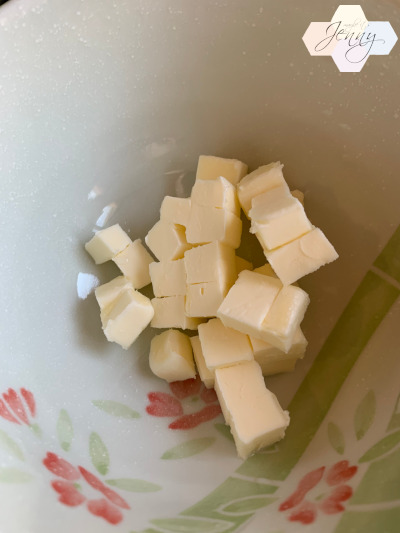
Unsalted Butter, cubed and softened at room temperature, 40 g (3 tablespoons)
Extra bread flour for the working surface
1 Medium Egg and 1 T Whole Milk mix for brushing the top
Prepare the Milk Bread:
1. In a large bowl mix flour and salt.
2. Add sugar, dry yeast and combine.
3. Add the egg (beaten), lukewarm milk and start to combine with a spatula.
4. Add the Tang Zhong and combine with a spatula until reach a very sticky dough.
5. Add the butter (room temperature) and combine with a spatula.
6. Sprinkle the work surface with at least 3 tbsp of flour and start to knead the dough with your hands; if you have a stand mixer you can use it, since the dough is pretty sticky.
7. Incorporate a little flour until knead the dough, but don’t add too much flour: the dough have to remain very soft and slightly sticky*
*NOTE: The consistency of your dough may vary depending of your flour. If your dough seems too wet, you can add up to 1-3 tbsp more flour until the dough comes together but consider that this is a pretty sticky dough. You can use your scraper instead of your hands to help you kneading.
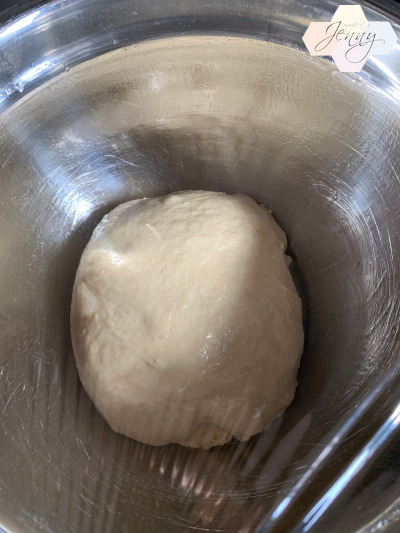
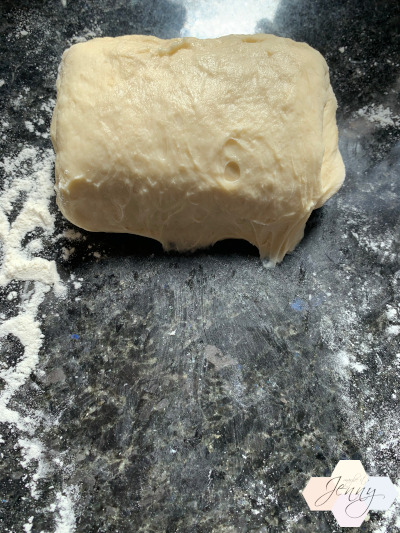
8. Knead for about 15 minutes or until the dough will be smooth and elastic.
9. Form into a ball, place it in a greased bowl and cover with plastic wrap.
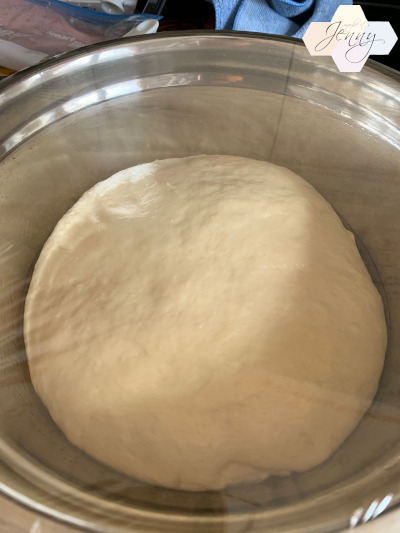
10. Let it rise in a warm place** for about 45 minutes or until triple in size: the dough will be ready when you poke it and it will maintain its shape.
** I preheated oven on 170°F (lowest my oven would go), turned it off after 5 minutes. Placed dough to rise in the warm oven, opened the oven door after 10 minutes because I was afraid it would be too hot in there.
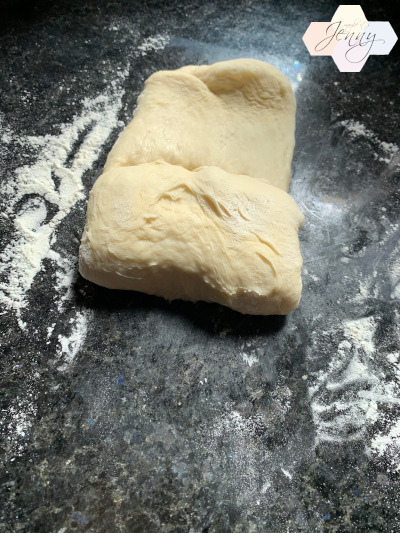
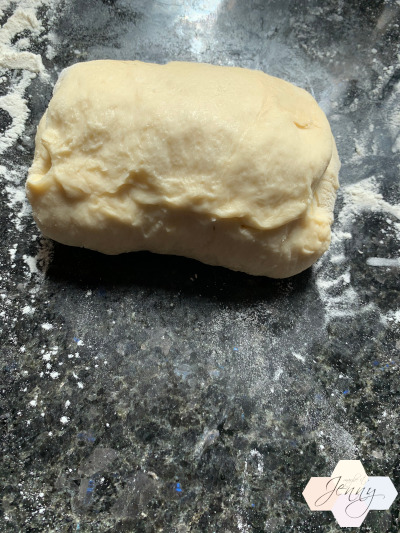
11. Transfer the dough over a silicone pastry mat or a floured surface and split it into 3 equal pieces.
12. Roll each piece into a ball and cover every ball with plastic wrap.
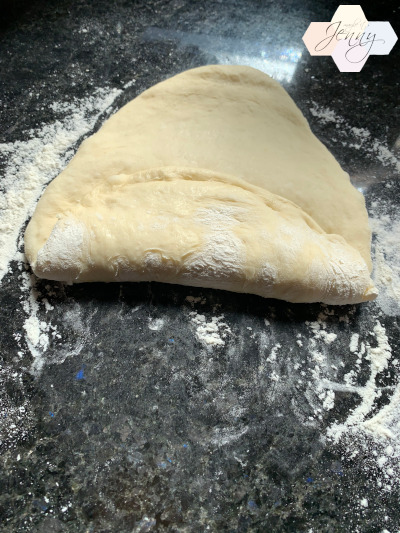
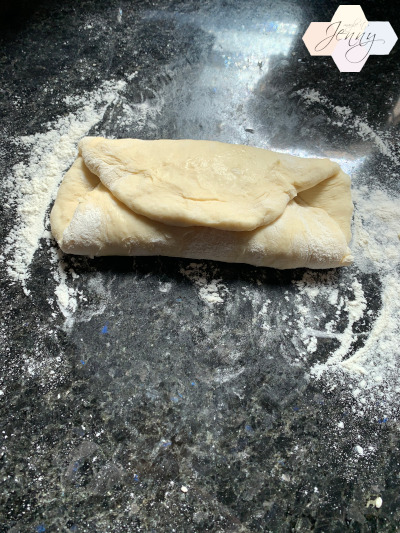
13. Use a rolling pin and roll one piece into a long oval shape.
14. Fold the right third of the oval over the middle, then fold the left third of the oval over the middle.
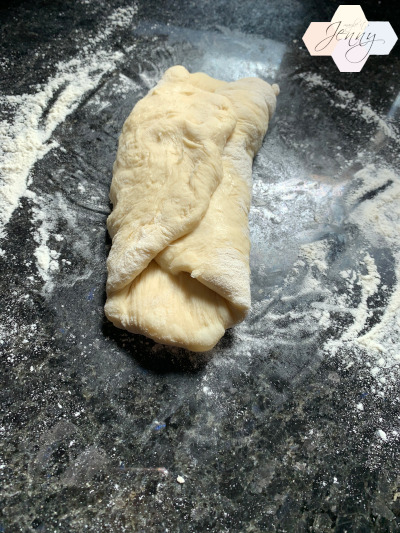
15. Turn the packet and roll it into a rectangular shape.
16. Roll the rectangular from the bottom to get a fat roll.
17. Cover the roll with plastic wrap and repeat with the other 2 pieces of dough.
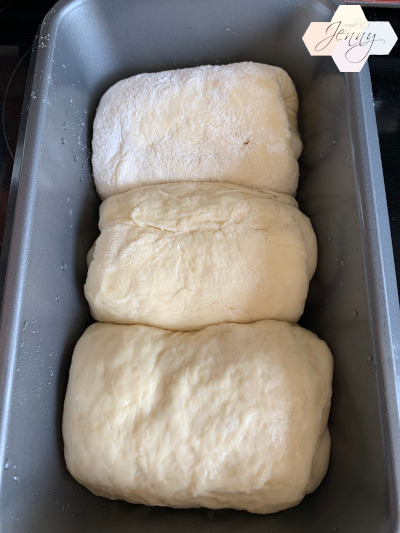
18. Arrange the 3 rolls of dough into a greased 11,5×22,5 cm – 4,5×9 inch loaf pan. (I have a 5 x 9 and it worked fine)
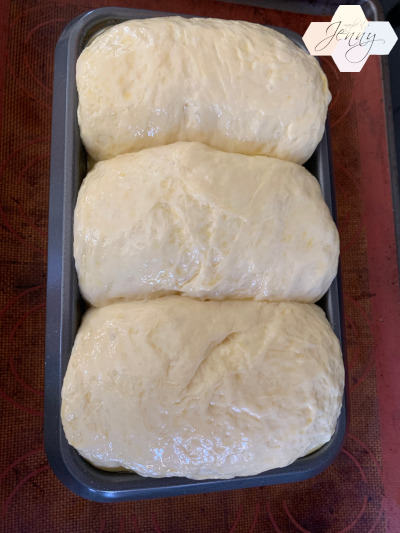
19. Cover with plastic wrap and let it rise in a warm place for about 30 minutes, or until the dough reaches the rim of the loaf pan.
20. Brush the top with beaten egg + milk.
21. Bake in a preheated static oven at 350°F for 25 minutes.
22. Cool down for 15 minutes, then remove from the pan and cool down on a wire rack
23. You can store the bread into a paper bag and place the paper bag into a plastic bag for about 1 week.
Recipe from: How Tasty


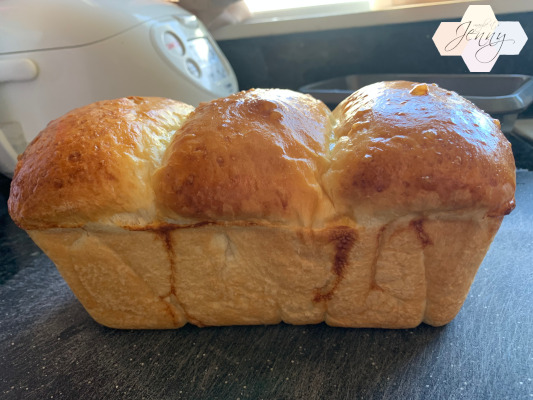
WOW! Looks like bakery bread! I think I have to wait until I retire before I attempt this. Meanwhile, Brug, here I come.
When I was typing up the recipe, I realized how hard and ridiculous it looks to make. I enjoyed doing it though! Would totally bake you a loaf, drop off service!
So beautiful!!!!
Thank you! Are you going to try to make it? lol
wow wow wow! looks so ono.
Oh it’s so ono! Especially with Liliha Bakery neon jelly and better…lol
I salivated when you pulled the bread. I can just smell it and would stuff my mouth with it!
Thanks Aunty! So great to hear from you, I hope you are doing well!!
Hi, Jenny! Thank you for the kind words from your previous post. What everyone else said is true; your bread looks like a bakery made it! But I’m sure it’s tons better because it was freshly made. So much hard work to make it, but well worth it for you. Enjoy your weekend!
Hey Arlene! Kind words, true words!
Thanks so much! I was really quite proud of the bread and was shocked I could produce it myself…! Measuring out the ingredients in grams I think makes all the difference. Hope you’re doing well!