How’s this recipe for timeliness? Happy New Year everyone! Super late greeting, I apologize. I really was meaning to post about Japan right after my trip but life just caught up with me. The holidays hit like a ton of bricks and then I had a whole bunch of annual doctor visits earlier this month so I’ve been pre-occupied. I hope you folks have been doing well! I’ll try to get back to a regular posting schedule again. Hopefully you folks are still interested in Japan content, I mean the visit was only last month but feels like eons ago.
So the recipe! Yeah, I got it off Tiktok. Hahaha who would’ve thunk. But isn’t it so cute! Our division had a little holiday tea so I made it to share. It’s cute and it’s one of those “tear and share” dishes. It’s also super easy to make…I just buy the ready made pizza crust and spinach artichoke dip from Sam’s Club. You can do it!
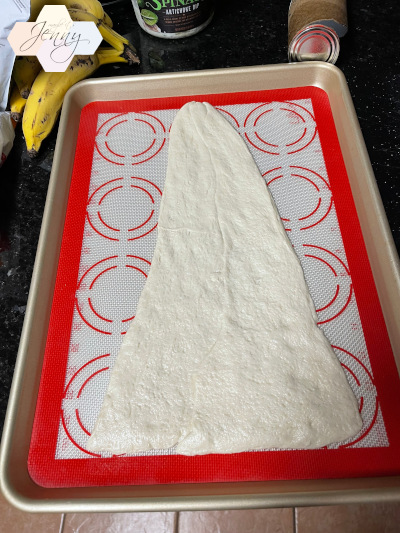
Like my perfectly shaped triangle? This recipe only requires one pizza crust. You cut the first triangle out of the rectangular dough and place it on the side to become the top layer of this dish. Then the remaining two triangles are used to form a big triangle to be the bottom of the tree.
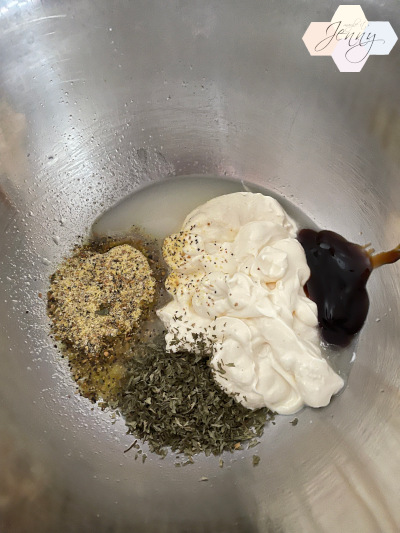
Spread that artichoke dip on the bottom layer. I think the urge is to put plenty (I know I wanted to) but realize you will have to be able to twist the “branches” so too much filling won’t do. Just do a nice sized thin layer.
You always hear that shredding your own cheese is better. Tastes better, blah blah blah. Yeah, I did that this time. I was kind of mad because I don’t have a good tool to do it. It was also like 4 in the morning. Anyway, place a layer of cheese on top! I won’t judge if you buy pre-shredded.
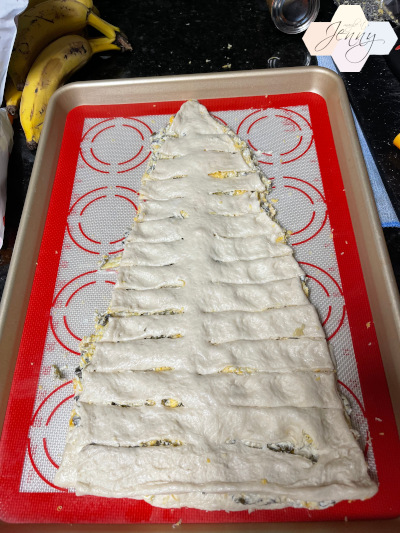
Top layer of the dough on top! You can see why this one is the top layer right? First it’s a nicer shape and second, this isn’t the one I had to merge together so there’s no seam.
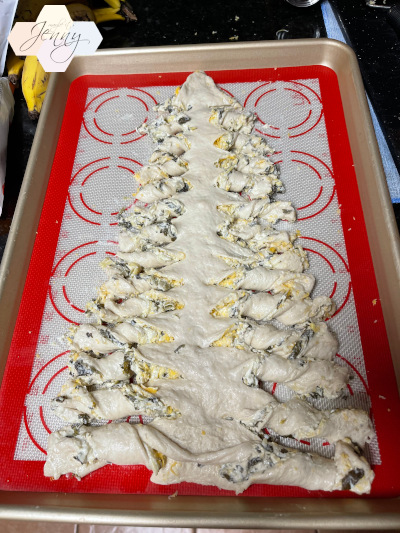
This is where a pizza cutter would come in super handy. I don’t have one. So I used a small knife, just make cuts like I did here!
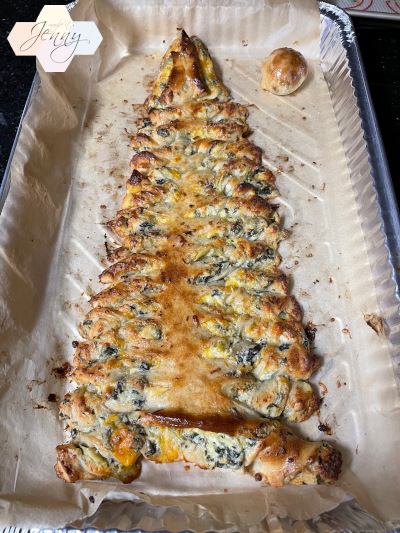
Then you twist! I did two twists for each branch. I do wonder if I made it again would I add maybe diced sun dried tomatoes? Top the tree off with a yellow star (yellow bell pepper)? It’s up to you!
Christmas Tree Appetizer
Ingredients
Pillsbury Classic Pizza Crust (13.8 oz tube)
1.5 to 2 C of Spinach Artichoke Dip (I used Member’s Mark brand)
3/4 C Shredded Cheese (I used Colby Jack, use as much cheese as you want)
2 T Butter, melted
Baking Sheet, lined
Instructions
- Lay out pizza dough (it will be a rectangular shape). Cut a triangle out of the rectangular dough and place it on the side to become the top layer of this dish. Then the remaining two triangles are used to form a big triangle to be the bottom of the tree, make it a similar size to the top layer triangle.
- Spread artichoke dip on the bottom layer. I think the urge is to put plenty (I know I wanted to) but realize you will have to be able to twist the “branches” so too much filling won’t do. Just do a nice sized thin layer.
- Spread shredded cheese on artichoke dip layer.
- Place the top triangle layer on top. Use a pizza cutter or small knife and cut one inch slats, don’t cut all the way through. Please refer to pictures above for visual.
- Then you twist! I did two twists for each branch. I do wonder if I made it again would I add maybe diced sun dried tomatoes? Top the tree off with a yellow star (yellow bell pepper)? It’s up to you!
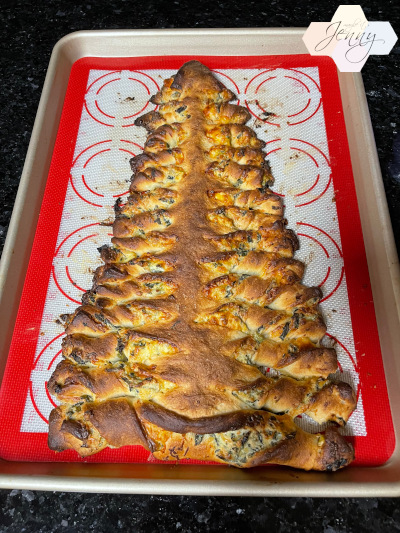
- Brush melted butter on top and place in pre-heated 400°F oven and bake for 20-22 minutes.
Note: I would do all of this directly on the baking sheet. This tree is huge and would be hard to transfer from place to place pre-baking.
A present for staying to the end. I made two that morning and here is the koge one. Hahaha
Post Views: 2,532