Recipe: Spinach Artichoke Christmas Tree

How’s this recipe for timeliness? Happy New Year everyone! Super late greeting, I apologize. I really was meaning to post about Japan right after my trip but life just caught up with me. The holidays hit like a ton of bricks and then I had a whole bunch of annual doctor visits earlier this month so I’ve been pre-occupied. I hope you folks have been doing well! I’ll try to get back to a regular posting schedule again. Hopefully you folks are still interested in Japan content, I mean the visit was only last month but feels like eons ago.

So the recipe! Yeah, I got it off Tiktok. Hahaha who would’ve thunk. But isn’t it so cute! Our division had a little holiday tea so I made it to share. It’s cute and it’s one of those “tear and share” dishes. It’s also super easy to make…I just buy the ready made pizza crust and spinach artichoke dip from Sam’s Club. You can do it!

Like my perfectly shaped triangle? This recipe only requires one pizza crust. You cut the first triangle out of the rectangular dough and place it on the side to become the top layer of this dish. Then the remaining two triangles are used to form a big triangle to be the bottom of the tree.

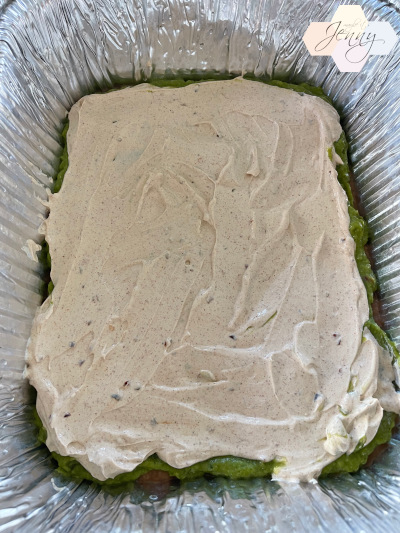
Spread that artichoke dip on the bottom layer. I think the urge is to put plenty (I know I wanted to) but realize you will have to be able to twist the “branches” so too much filling won’t do. Just do a nice sized thin layer.

You always hear that shredding your own cheese is better. Tastes better, blah blah blah. Yeah, I did that this time. I was kind of mad because I don’t have a good tool to do it. It was also like 4 in the morning. Anyway, place a layer of cheese on top! I won’t judge if you buy pre-shredded.

Top layer of the dough on top! You can see why this one is the top layer right? First it’s a nicer shape and second, this isn’t the one I had to merge together so there’s no seam.

This is where a pizza cutter would come in super handy. I don’t have one. So I used a small knife, just make cuts like I did here!

Then you twist! I did two twists for each branch. I do wonder if I made it again would I add maybe diced sun dried tomatoes? Top the tree off with a yellow star (yellow bell pepper)? It’s up to you!

Christmas Tree Appetizer

Ingredients
Pillsbury Classic Pizza Crust (13.8 oz tube)
1.5 to 2 C of Spinach Artichoke Dip (I used Member’s Mark brand)
3/4 C Shredded Cheese (I used Colby Jack, use as much cheese as you want)
2 T Butter, melted

Baking Sheet, lined

Instructions

  1. Lay out pizza dough (it will be a rectangular shape). Cut a triangle out of the rectangular dough and place it on the side to become the top layer of this dish. Then the remaining two triangles are used to form a big triangle to be the bottom of the tree, make it a similar size to the top layer triangle.
  2. Spread artichoke dip on the bottom layer. I think the urge is to put plenty (I know I wanted to) but realize you will have to be able to twist the “branches” so too much filling won’t do. Just do a nice sized thin layer.
  3. Spread shredded cheese on artichoke dip layer.
  4. Place the top triangle layer on top. Use a pizza cutter or small knife and cut one inch slats, don’t cut all the way through. Please refer to pictures above for visual.
  5. Then you twist! I did two twists for each branch. I do wonder if I made it again would I add maybe diced sun dried tomatoes? Top the tree off with a yellow star (yellow bell pepper)? It’s up to you!
  6. Brush melted butter on top and place in pre-heated 400°F oven and bake for 20-22 minutes.

Note: I would do all of this directly on the baking sheet. This tree is huge and would be hard to transfer from place to place pre-baking.

A present for staying to the end. I made two that morning and here is the koge one. Hahaha

Recipe: Cowboy Butter

What is cowboy butter you ask? I don’t know. I saw this video on TikTok and it’s just been on my mind. It’s just a sauce you can serve up with your main protein. I bet it would work well with any protein! I served it up with rib eye steak. How was your thanksgiving? We don’t really do turkey, we’ve never been a huge fan of turkey anyhow. So yeah, I bought a few sides from Sam’s Club and a thing of rib eye steaks. I bought a thing of spinach and made it Korean style (just garlic, sesame oil and salt). It was a pretty easy meal to make and was enjoyed by all! A lot!

From clockwise from top right: spinach banchan, twice-baked potatoes, macaroni and cheese, rib eye steaks, cowboy butter!!

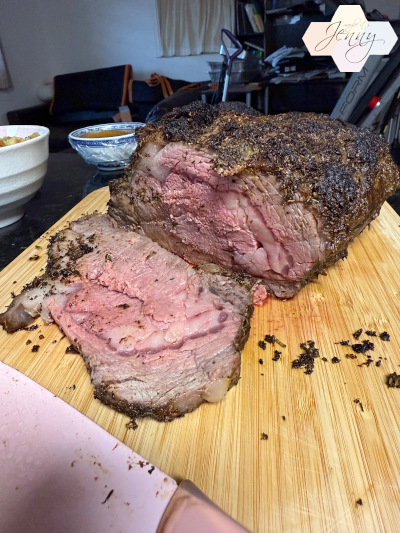
Yeah, the steak is still super pink inside. That’s how okay? SO GOOD. I only salt and peppered the steak and pan fried it for about 2 minutes on each side.

Cowboy Butter

Ingredients

12 T Butter

1 lemon, juice and zest
1 T dijon mustard

1 t cayenne

2 t paprika

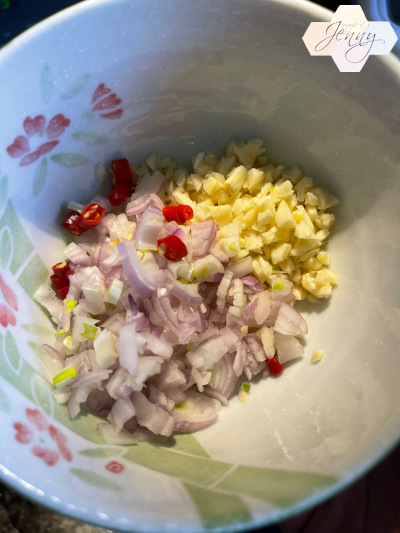
8-10 garlic cloves, minced

2 T Chives, minced

2 t thyme, minced

2 tsp chili flakes

4 T fresh parsley, chopped

Salt and pepper to taste

Instructions

Heat pan over low heat and melt butter, lemon juice, dijon mustard, cayenne, paprika, lemon zest, garlic and whisk together. Melting and cooking slowly over low heat (this is to help the butter keep mostly thick and not turning quickly to fat) – about 5 minutes.

Add chives, thyme, chili flakes and parsley and cook together for about 3-5 minutes more. Add salt and pepper to your tastes. Serve up as a side sauce to some great grilled steaks!

Recipe: Tuna Tofu Patties

Okay lol. I made this recipe and must have messed it up somehow. It became a tuna tofu scramble and I’m okay with that. I was actually really rushed for time that day and the mixture was not working with me when I tried to form patties. I gave up and just stir fried it all up.

I don’t know where I messed up, I did double the recipe but followed it exactly. Anyway, I really enjoyed how this tasted so I’ll share the recipe as is.

2 blocks of firm tofu after I pressed it to drain, crumbled it up real nice. Is this considered okara?

I can’t find my grater for the life of me so I use a vegetable peeler to peel out long strips and then hand mince the carrots. I was not having it so you can see the different sizes. It’s okay, it makes for a better texture, lol. What do you think I did wrong for it not to form into patties?

Anyway, no Mixed Plate Friday post this week! Enjoy your thanksgiving and I hope you get some super good Black Friday deals!

Tuna Tofu Patties

Ingredients
1 block firm tofu (about 14 ounces)
1 (5-6 ounce) can tuna
1 egg
2 tablespoons panko (or breadcrumbs)
1 small carrot, grated
1 small onion, chopped
2 stalks green onions, chopped
1 tablespoon ginger, minced
1 tablespoon soy sauce
1 tablespoon oyster sauce
1 tablespoon sesame oil

Instructions
First you must crumble the tofu. To do that, drain as much moisture as you can from the tofu. I do this by putting the tofu block in a colander. Put a plate on directly on top of the tofu. Then put a canned good (or cup filled with water) on top of that plate to weigh it down. Let sit for 15 minutes. Then you crumble the tofu (use your hands) into a bowl.
In a mixing bowl, combine the crumbled tofu with the tuna, egg, panko, carrots, onions, green onions, and ginger.
Mix everything until it’s well combined. Then season the mixture with the soy sauce, oyster sauce and sesame oil.
Gently form into small 2-inch patties. Pan fry the patties on each side for 3-5 minutes. Serve hot, with a bowl of rice or as a side dish to a larger meal! Enjoy ^_^

Recipe is from Onolicious Hawaii.

Recipe: Braised Tofu

Yes, another tiktok recipe. But I am loving these recipe videos that invoke cooking from my roots. I’ve always loved braised tofu dishes in Chinese restaurants. To be honest, my family didn’t cook much of it at home. Not sure why, it’s a pretty healthy dish. It can be vegan if you use vegan oyster sauce and veggie stock cubes. Well, I made the dish as authentic as can be which includes deep frying soft tofu cubes. Oh boy. I can see why my family didn’t make this ever. But was it worth the effort? I believe so.

During and after frying. Yeah, some tofu got more tanned than others. You got a problem with that? lol

Rehyrated Shiitake Mushrooms

Original recipe I followed only had bamboo shoots, I couldn’t resist throwing in young corn!

Braised Tofu Recipe

Ingredients
2 boxes of soft tofu
2 cans sliced bamboo shoots (I used Family Brand, 8 oz. cans)
2 cans young carrots (I used Family brand, 8 oz. cans)
30 dried shiitake mushrooms, rehydrated in 6-8 C warm water for at least one hour (reserve soaking liquid)
4 C shiitake soaking liquid, avoid scooping up any settlement from soaking
4 stalks green onions, thinly sliced
6 cloves garlic, minced
2 T doubanjjang
Neutral oil for frying

Sauce:
2 T oyster sauce
1 T soy sauce
2 chicken bouillon cubes
2 tsp dark soy sauce
1 t sugar
2 pinches of salt
4 T cornstarch slurry (4 T of water to 2 T of cornstarch)

Instructions

  1. Drain tofu, wrap in paper towel and press out excess water (place a plate on top and weigh it down to get out more water)
  2. Cube tofu and heat up at least 1-1.5 cups of oil in a frying pan (depends how big your pan is, the oil level should be about half the height of the tofu
  3. Heat up oil and add tofu cubes and fry, flip to brown both ends. Remove from oil when the tofu is golden brown
  4. Heat up pan with about 2 T oil, add garlic and doubanjjang to saute for about 30 seconds
  5. Add bamboo shoots, saute for 10-15 seconds
  6. Add young corn, saute for 10-15 seconds
  7. Add shiitake mushrooms, tofu, and the sauce, mix well
  8. Add 4 C shiitake soaking liquid and cover to simmer for about 10 minutes on medium-high heat
  9. Add cornstarch slurry and heat up until sauce is thick
  10. Option, blanch bok choy and line bottom of your serving dish with bok choy before adding braised tofu on top

Notes:

  • Yes, this a lot. You can definitely half this recipe – I always cook for a crowd
  • I like spice so this is the amount of doubanjjang I add – if you can’t handle the spice, cut the amount I add by half
  • Next time, I would add one more block of tofu (I think could even take two more blocks of tofu)

Blanced bok choy ready to be smothered!

This is gonna be like my meals for the week but I couldn’t resist taking a few bites. It was delicious!!!!

Recipe: Healthy Burrito Bowl

I’m back with another TikTok Recipe. This one works quite well and I think is quite easy. When I reheat it, people compliment the smell in the office but I still dread eating it after a while. I mean, it’s a healthy burrito bowl but I digress. Gotta eat healthy some of the time right? Well should be most of the time.

Healthy Burrito Bowl

Ingredients

2 C long grain rice/brown rice, cooked according to instructions
2 lb. Ground Turkey, defrosted
1 package Frozen Pepper and Onion Blend, 20 oz
1 Taco seasoning packet, low sodium
1 can black beans (low sodium if able), not drained
1 can Medium Diced Green Chiles, 4 Oz
1 can Rotel Hot Diced Tomatoes with Habaneros, 10 oz.
Shredded Rotisserie Chicken Breast (optional, I shredded Sam’s Club entire breast of rotisserie)

Salt to taste

Instructions

  1. Cook rice as directed on package
  2. Add non stick spray in pan, saute pepper and onions for 2 minutes
  3. Add ground turkey and smash into small pieces
  4. Add taco seasoning, black beans, diced green chilies, and diced tomatoes
  5. Simmer on medium heat for 10 minutes or until turkey is cooked through
  6. Add shredded chicken breast and just heat through (about 2 minutes)
  7. Add mixture to the rice and combine, best served warm

Notes:

  • Original recipe called for 2 packets of taco seasoning, I only need 1 and it works fine
  • Original recipe doesn’t call for the rotisserie chicken breast, I just added it cause I had it. I now make it without the chicken breast and it works fine too!

Cooked mixture ready to mix with the…

Super easy recipe to make. You don’t even have to chop up any vegetables.

Mixed Plate Friday

If you follow Jalna’s blog, you might remember this post about the cured pork strips they got. I remember eating this as a kid, it wasn’t an everyday dish. It’s pricey and also a bit of an indulgence since it’s got a lot of pork fat. It was such a coincidence that I had also bought a pack from Chinatown and it was sitting in my fridge waiting to be made.

I never made it before but remember the elements of it from my memory. I knew I wanted to make it with green beans but only with these flat ones. I don’t know why I had to be so specific with it. I didn’t have a real recipe to go off of, maybe what I had was more of a family dish. I blanched the beans fast kine and then stir fried the pork and beans together. I didn’t want to add too much seasoning because the pork is super flavorful (aka salty) so I added a dash of soy, oyster sauce and sugar. Oh I also started the stirfry with minced garlic. Look. It was damn delicious. I was trying to hold the dish on to last a few days. I ate it in one day. It was just that good. But it could be an acquired taste.

Another family dish I have been making on my own. Ong Choy! Crucial ingredient? Harm Haw. Gotta have that. I just fried up garlic and red chili pepper, add the shrimp paste and then add the stems first….cook for like 2 minutes and then add the leaves and cook down. I must have added some water to this too. I’m sure folks usually do a cornstarch slurry to make the gravy thick. I was lazy. Another vegetable dish I love.

Smoked Chicken Pasta | $18.50
with onions, roasted tomatoes, garlic and fresh herbs, in a white wine and chicken stock, tossed over linguini

I got this dish the other week at Murphy’s, it was one of their specials. Eh. Was alright, I mean, I keep comparing the food to the price because how can I not? The chicken breast was good, super moist and there was a smoky taste so I enjoyed it. Wish there was a bit more pasta. I don’t get why restaurants like grinch out on the cheaper stuff. I think customers are easily fooled if they see more pasta haha. And I am adjusting to a new contact power and it’s hard to see up close now…if not, I would have noticed it said chicken stock. Yeah, it’s sitting in a chicken stock. I wasn’t expecting that. Yeah, I wouldn’t get this again.

Apple Crisp a la mode | $8.00

It’s okay, their apple crisp always comes to save the day. It saved the day. I loved it. Warmed apple crisp ala mode. You can’t go wrong. Have a great weekend everyone!

Recipe: Baked Tilapia with Lemon

I’m going to try some new dishes and wanted to get more into Mediterranean cooking/dishes. So here’s to the start of some recipes! This one came out REALLY good. And my gosh, doesn’t it look professional? I don’t think I made a dish look so good before (parchment paper and all)

The yummy mixture before I laid the tilapia filets on top for baking. I wanted to slap myself silly – I bought capers just for this dish and totally forgot to add it. I LOVE capers. I guess it will have to wait for the next time.

I bought the frozen pack of tilapia from Sam’s club, this recipe uses 4 filets and the pack comes with 8. PERFECT.

Right after baking in the oven

Baked Tilapia with Lemon

Ingredients

  • 1 pint cherry tomatoes, sliced in half
  • 1 large shallot, thinly sliced
  • 3 garlic cloves, minced
  • 1 small lemon, thinly sliced into rings
  • 2 tablespoons olive oil, divided
  • ¾ teaspoon kosher salt
  • 4 ounce block feta cheese
  • 1 1/2 pounds tilapia
  • 1 tablespoon Italian seasoning
  • 1 pinch red pepper flakes (optional)
  • ½ teaspoon smoked paprika (or standard paprika)
  • 2 tablespoons drained capers
  • Finely chopped fresh parsley or basil, for garnish
  • Fresh ground black pepper

Instructions

  1. Preheat the oven to 425 degrees Fahrenheit.
  2. Chop the tomatoes, shallot, garlic, and lemon as noted above.
  3. Place the chopped vegetables and lemon slices in the bottom of a 9 x 13″ baking dish and mix with 1 tablespoon olive oil, ¼ teaspoon salt, and fresh ground black pepper. Crumble the feta cheese into rough chunks and add it to the pan, tossing gently to combine.
  4. Pat the tilapia dry. Rub it with 1 tablespoon olive oil and ½ teaspoon kosher salt, split between the filets. Place it on top of the vegetables and feta in the pan. Sprinkle both fillets with the Italian seasoning and a few grinds fresh ground black pepper, then add the red pepper flakes and smoked paprika. Sprinkle the capers over the top.
  5. Place the pan in the oven and bake for 20 to 25 minutes (depending on the thickness of the fish), until the fish is flaky and the internal temperature is 140 degrees Fahrenheit when measured with a food thermometer. Garnish with chopped parsley and remove the lemon slices when serving (or eat them if you like!).

Recipe Credit: https://www.acouplecooks.com/baked-tilapia/

A quick salad I threw together with the fish on top. I know, no can see the fish. It’s there. It’s sooo good! Highly recommend trying this recipe!

Recipe: Chickpea Salad Sandwich

This recipe was trending a bit on social media – using chickpeas to make a mock tuna salad. I think it tastes great, does it taste like tuna salad? No. But it tastes good enough for me! Here is the recipe I followed: link here.

Let me do a quick rant about bread I bought at Sam’s Club. I bought it on I think Thursday night and this was Sunday morning.

At first, I thought it was like maybe a burnt mark or something? I don’t know, I was grasping at straws.

Definitely mold. I was so mad. But it was also not worth it to me to go back for $3 something. Ugh! I just gonna put bread straight into the fridge when I get it now. I went Longs on Monday morning and saw the same brand with the same marks on it on the shelf. Blah! Be careful!

Recipe: Taro Cake

I’ve decided to explore my roots through cooking and here is one! You’ve probably had taro cake in dim sum restaurants. They’ll pan fry up these thick slices of dough, you can barely taste any different between the rice dough and the taro pieces. It was nothing like the taro cake I grew up with. Although, my family’s recipes went through variations too. It started off with taro but soon became potato cake and then black eyed pea cake. Perhaps they were playing with flavors or maybe trying to find economical and easier ways to prepare this dish.

I haven’t had this dish in quite a while and had a strong craving for it, unfortunately, I am unable to find a similar dish in restaurants so here we go.

Dried shiitakes, rehydrated in hot water and diced

Lup cheong, diced

Boiled taro, cubed. This is the first time I worked with taro and boy oh boy, I can see why my family moved away from it but to me, it’s worth the work (the peeling!!!) and the taste is irreplacable.

Dried small shrimp, soaked in hot water and then minced. Keep that water from soaking! Absolute star of the recipe, you cannot omit this ingredient!

Stirfry the above ingredients together with some chicken bouillion, oyster sauce…your kitchen will smell DELICIOUS.

The rice mixture is super thin, the liquid is from the shrimp liquid. I think it made a difference, so much more flavor!

I added a layer of the filling at the bottom of the dish and then spooned the rice liquid on top until it was barely covering the filling and steamed it.

Right out of the steamer…

Love the sprinkling of roasted sesame seeds and chopped green onions on top. This recipe came out great!

Wu Tao Gau
“Taro Cake”

Ingredients

Batter:

180 g rice flour 

½ t salt

½ t sugar

½ t white pepper

2 C of dried shrimp water

Taro Mixture:

340g taro root (weight after peel is removed), boiled, peeled and cut into small cubes

25g dried shrimp, rehydrated in 2 C of hot water

  • Reserve 2C of the dried shrimp water for use in the batter

8-10 shiitakes, rehydrated and minced (no stems)

2 lup cheong (Chinese sausage), cut into small pieces

2 T oil (vegetable/corn/canola)

1 chicken bouillon cube

½ – ¾ C water

2 T oyster sauce

Garnish:

Minced green onions

Roasted Sesame Seed

Directions:

Boil taro root in water for 45-50 minutes. Drain and let taro cool down in cold water, okay to make it ice water. Once cooled, taro skin will come off easily. Dice into small cubes.

Heat up 4C of water, split in half to soak dried shrimp and dried shiitakes separately for an hour. 

Drain both shiitake and dried shrimp, reserve the shrimp water! Mince both shrimp and shiitakes into small pieces. Dice lup cheong into small pieces.

Heat oil in a pan, add lup cheong and stir fry until fragrant. Add shiitake and stir fry for about 30 seconds, add dried shrimp and stir fry for another 30 seconds. Add taro root and stir fry for about a minute. Add chicken bouillon cube and about ½ to ¾ C of water. Let mixture simmer on medium high for about 10 minutes. 

Remove mixture and place on the side. Mix together rice flour, salt, sugar and white pepper in a bowl. Reheat dried shrimp water in the microwave for about 1 minute. Slowly stream 1.5 C of the water into the dry ingredients while whisking.

Prepare a steamer on high heat. Grease a glass pie dish (pyrex kind) with a neutral oil (corn, canola, vegetable) and add about ¼ C of the taro mixture to the bottom of the dish. Once the water is boiling, mix the rice batter right before ladling about 2-3 soup ladles full onto pie dish. Place in steam and steam for 25 minutes on high. Check after about 15 minutes for the water level, add more water as needed.

Remove from heat and garnish immediately with green onions and sesame seeds. Best served warm, enjoy!

Note: This made about 3 pie dishes worth with tons of taro mixture leftover. Will play around with batter recipe for correct yield to the taro mixture.

Recipe: Mixed Berry Muffins

Sorry, I don’t have high end pictures for you folks like ever. And this picture is actually of the first batch I made that weren’t as good as the second batch. Okay, actually I personally liked the first batch because it was super dense and moist to me. But muffins are not supposed to be like that. I took a look at my baking powder and realized it was 2 YEARS after the best by date. Oops. So I went out and bought new AP flour and baking powder and boom, the muffins were a hit at work!

And yes, I did get this recipe from TikTok. It was from a very sweet older man who exclaimed his wife eats 1-2 of these muffins a day. His recipe was all raspberries while mine has strawberries, blackberries, blueberries and raspberries (not trying to sound fancy, that’s just what comes in the frozen bags for smoothies!). This is a great recipe and the lemon zest really adds the perfect zing. The recipe below includes my little tweaks.

Mixed Berries Muffins

Dry Mix
3 C all purpose flour (no need to sift)
1 1/4 C sugar (I probably just used 1C and 2T)
4 t baking powder

Wet Mix
⅔ C oil (corn, canola, vegetable)
2 large eggs
1 T pure vanilla extract
1 C buttermilk
Zest of 1 lemon
1 C frozen strawberries, chopped small
1 C frozen mixed berries, chopped small

Chop up strawberries and place back into freezer. Chop up frozen mixed berries and place back into freezer, keep the 2 cups of berries separate.

Mix dry ingredients in a bowl, set aside.

Mix wet ingredients together in a bowl and pour into dry ingredients. Mix until batter is formed (no flour left). 

Add frozen berries one cup at a time, folding berries into the mixture (do not mix or overmix). Spoon into lined muffin tins.

Bake at 400 degrees for 23 minutes or until a toothpick comes out clean.

Note: Batter produced enough for about 18 muffins.